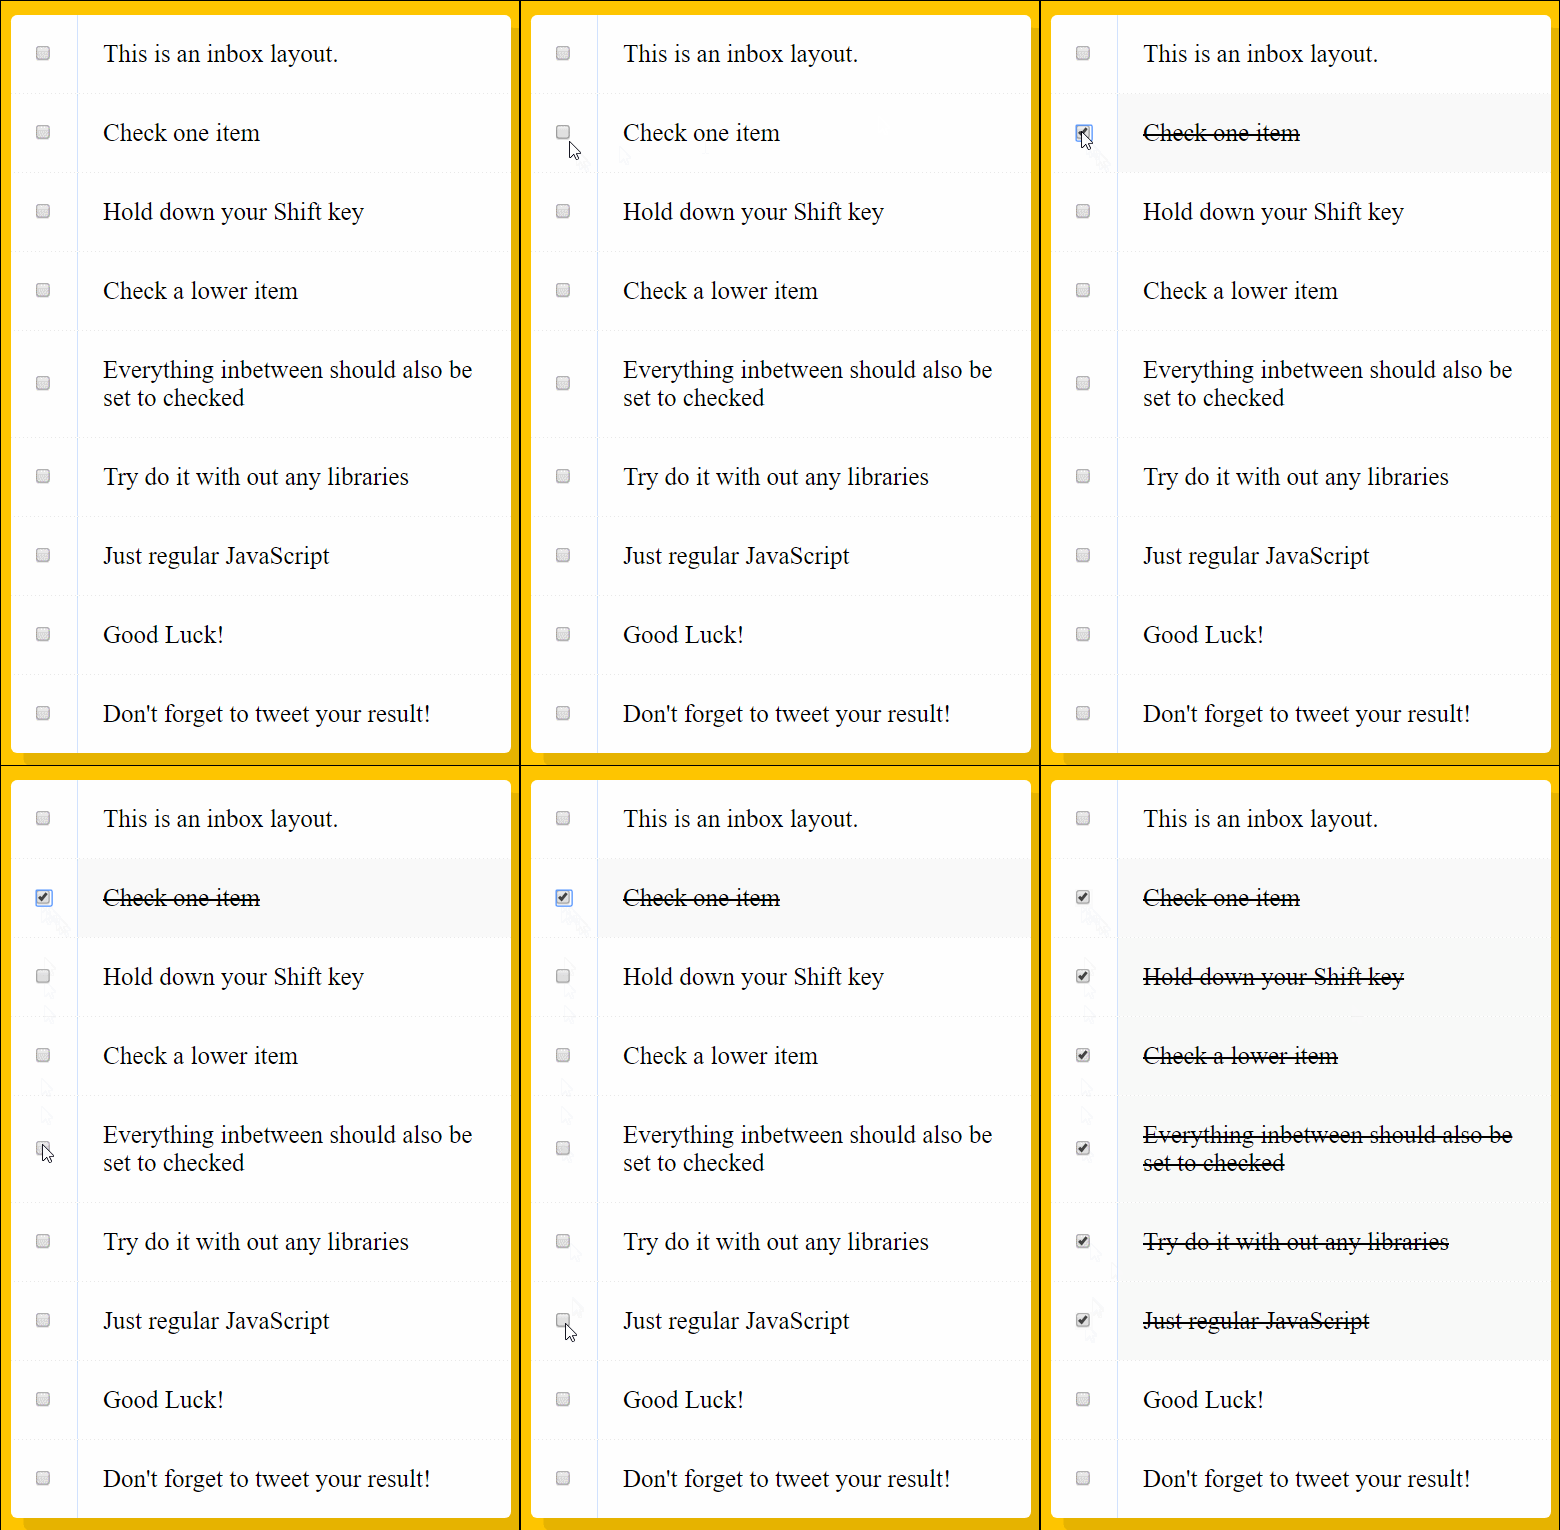
Checkboxes have been a fundamental part of web experiences like mail and forms. Today we will take a look at one key implementation that has made deleting multiple emails painless.
You may have experienced this but in case you haven’t, when you’re using an email client like Gmail and you want to delete multiple email let’s say the most recent 5 emails in your inbox. You typically have a few options:
- Delete all emails one at a time
- Select all emails one at a time then delete all at once
- Select the first email, then the last email and magically select all the items inbetween them then delete at once.
Now of the above options, the one that takes the least number of steps is option 3. This may not seem the case when you’re dealing with a small number but let’s say you now want to delete 15 items, you’ll quickly hate checkboxes. Fortunately, with the power of JavaScript, option 3 (illustrated below) is made possible and let us take a look at how to implement it with vanilla JS (no libraries).

As per convention, we will lay out our pseudocode first.
Get access to checkboxes
For every checkbox
    Listen for click and do something when event fires
The above pseudocode then translates to the following javascript code:
// Get all the checkboxes
const checkboxes = document.querySelectorAll('.inbox input[type="checkbox"]');

function handleCheck(e) {
    console.log("clicked");

}

checkboxes.forEach(checkbox => checkbox.addEventListener('click', handleCheck));
This should be working right? Well not quite, yes we have successfully implemented our pseudocode but now it’s time to get down to the nitty gritty details of what that “do something” in our pseudocode really means.
We know that everything will be in the handleCheck() function, so that’s settled. Next thing we need to figure out is how to keep track of the last checked item and also get an idea of where to start and end our list of items to be checked. So let’s do that.
// Get all the checkboxes
const checkboxes = document.querySelectorAll('.inbox input[type="checkbox"]');

let lastChecked; // Keep track of the last checked item

function handleCheck(e) {
    console.log("clicked");
    let inBetween = false; // Flag variable to let us know where to start checking and where to stop

    lastChecked = this;
}

checkboxes.forEach(checkbox => checkbox.addEventListener('click', handleCheck));
Great. Now that we are able to do that, let us then check that the shift key is pressed and that the current item is being checked not being unchecked then we can finish off baking our pizza.
// Get all the checkboxes
const checkboxes = document.querySelectorAll('.inbox input[type="checkbox"]');

let lastChecked; // Keep track of the last checked item

function handleCheck(e) {
    console.log("clicked");
    let inBetween = false; // Flag variable to let us know where to start checking and where to stop

    // Check if they had the shift key down
    // And check that they are checking it not unchecking it
    if(e.shiftKey && this.checked){
        // Make the pizza


    }
    lastChecked = this;
}

checkboxes.forEach(checkbox => checkbox.addEventListener('click', handleCheck));
Now all that is left is to check all the check boxes that we encounter when inBetween = true. So when we check the first item, inBetween is set to true and when we check the last item inBetween is set to false to make it possible.
// Get all the checkboxes
const checkboxes = document.querySelectorAll('.inbox input[type="checkbox"]');

let lastChecked; // Keep track of the last checked item

function handleCheck(e) {
    console.log("clicked");
    let inBetween = false; // Flag variable to let us know where to start checking and where to stop

    // Check if they had the shift key down
    // And check that they are checking it not unchecking it
    if(e.shiftKey && this.checked){
        // Make the pizza
        // Loop over every checkbox
        checkboxes.forEach(checkbox => {
            // Flip the flag variable to true when we check first item then to false when we check the last item
            if(checkbox === this || checkbox === lastChecked){
                inBetween = !inBetween;
            }

            // Check all the checkboxes we encounter as long as inBetween is true
            if(inBetween){
                checkbox.checked = true;
            }

        });

    }
    lastChecked = this;
}

checkboxes.forEach(checkbox => checkbox.addEventListener('click', handleCheck));
And voila! A delicious pizza is ready, well wouldn’t that be great. At least now we know how to implement a good user friendly list of items that allows multiple checks in 3 steps: click first item, hold shift and click last item.
Tweet me @Rayhatron and let’s chat about some cool user experiences you’ve been through and have or would like to recreate with JavaScript.
You can find the full Javascript30 Day 10-Hold shift to check multiple checkboxes code here.